OpenERP Server Installation
The OpenERP Server 6.1 installation works with disks formatted in NTFS (not a FAT or FAT32 partition). The following installation procedure has been well-tested on Windows 7.
Note
Windows Versions
OpenERP Server does not work on Windows 98 or ME; for obvious reasons – these cannot be formatted using NTFS.
You will need a PostgreSQL server up and running. If it is not the case, you can read the PostgreSQL Server Installation and Configuration section.
Downloading the OpenERP Server
The OpenERP Server can be downloaded from OpenERP website’s download page.
Under Windows Auto-Installer, choose All-In-One to download OpenERP.
Installing the OpenERP Server
Execute the installer you have just downloaded. It has the following stages:
- Select installation language
The default is English. The other option is French.
- Welcome message
Carefully follow the recommendations given in this step.
- Licence Agreement
It is important that you accept the GNU General Public License to proceed with installation.
- Select folder for installation
By default, OpenERP Server is installed in C:\Program Files\OpenERP 6.1\Server. To install in a different folder, browse for a different location(folder) in this step.
- Configure PostgreSQL connection
The installer will suggest default parameters to complete your PostgreSQL connection configuration. You may accept the defaults, or change it according to your requirement.
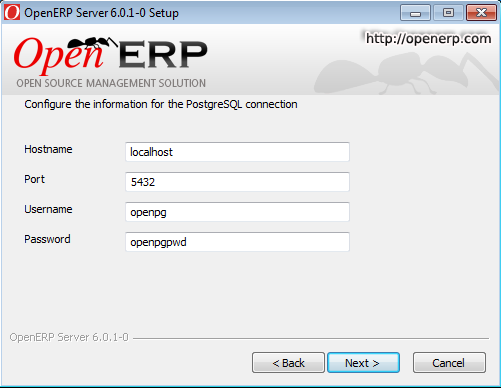
PostgreSQL configuration
- Create shortcuts
Select a folder in the Start menu where you would like to create the program’s shortcuts.
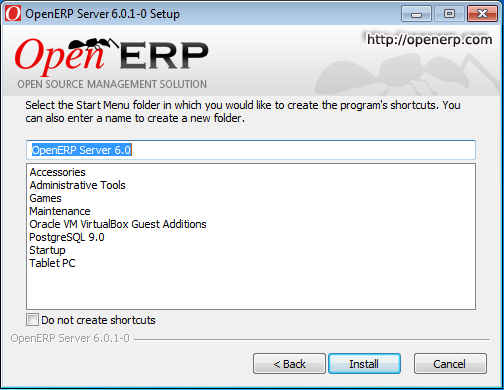
Create Start menu shortcuts
- Install
The automatic installation of OpenERP Server begins and you can view its progress.
- Finish
On successful installation of OpenERP Server, you will get an appropriate confirmation. You can click Finish to close the setup wizard.
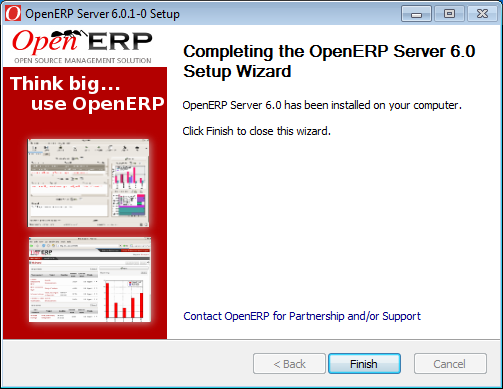
End of setup wizard
The OpenERP Server installs as a Windows service. This means you do not have to start the server each time you start the computer and it runs without the need of an open user session.
Customized Configuration
To initialize the server with configurations of your choice, you have to invoke it at the Windows Command prompt with the options you wish to override.
Navigate to the installation directory in C:\Program Files\OpenERP 6.1\Server\ and type this command but do not execute it yet:
openerp-server.exe -d <db_name> -r <db_user> -w <db_password>
--db_host=<postgresql_server_address>
--db_port=<port_no> --logfile="<logfile>"
The initialization of OpenERP Server provides necessary information for connection to the PostgreSQL database and the choice of data to load. Here is the explanation of used options:
- -d <db_name> : Name of the database created for OpenERP Server.
- -r <db_user> : Name of the PostgreSQL user (role).
- -w <db_password> : Password of the PostgreSQL user.
- --db_host=<postgresql_server_address> : Address of the server where PostgreSQL is. If you have installed PostgreSQL on the same computer as OpenERP Server, you can enter localhost, else, the IP address or the name of the distant server.
- --db_port=<port_no> : Port number where PostgreSQL listens. The default is 5432.
- --stop-after-init : This option stops the server after initialization.
- --logfile="<logfile>" : specify an alternate logfile where all the output of server will be saved. The default is C:\Program Files\OpenERP 6.1\Server\openerp-server.log.
Before the execution of this command you have to decide the purpose of the database created in OpenERP.
Sample command:
openerp-server.exe -d openerpdemo -r openpg -w openpgpwd
--db_host=localhost --logfile="C:\Users\tiny\Desktop\demo_db.log"
--db_port=5430 --stop-after-init
Here you have to enter the username and password specified in the PostgreSQL connection configuration during server installation.
When you execute the initialization command, if you specify a logfile, the server runtime output is written to that file, and you will not see any server output in the prompt window. You have only to wait until the prompt comes back.
Deciding about the purpose of the database
You can initialize the database with OpenERP Server to:
- Take a look at the system with modules installed and demo data loaded
- Install a new clean database system (without demo data)
- Upgrade an existing version
With modules and demo data
If you execute the sample command above, you will get a database with only base modules installed and loaded with demo data. To initialize OpenERP Server with additional modules and its demo data, you need to add this option to the above command:
-i <module name>
Sample command:
openerp-server.exe -d openerpdemo --stop-after-init -i sale
This command will initialize the OpenERP Server with the module sale and its dependencies, and fill its PostgreSQL database with their related demo data. As can be seen, you must specify the target database for the module installation.
To install more than one module, specify a comma-separated module list at the command-line.
Without demo data (or new clean version)
Execute the command with an option excluding the demo data:
--without-demo=all
This will load base modules (and other modules if -i option is used), but will not load its demo data.
Sample command usage:
openerp-server.exe -d openerpdemo --stop-after-init --without-demo=all
If you have already initialized the database with demo data loaded, you can create a new database and execute the above command on it.
Update the database
Execute the command with an option that updates the data structures:
--update=all
Sample command usage:
openerp-server.exe -d openerpdemo --stop-after-init --update=all
Monitoring the OpenERP Server
The service and some runtime information is accessible through the Computer Management console in Administrative Tools.
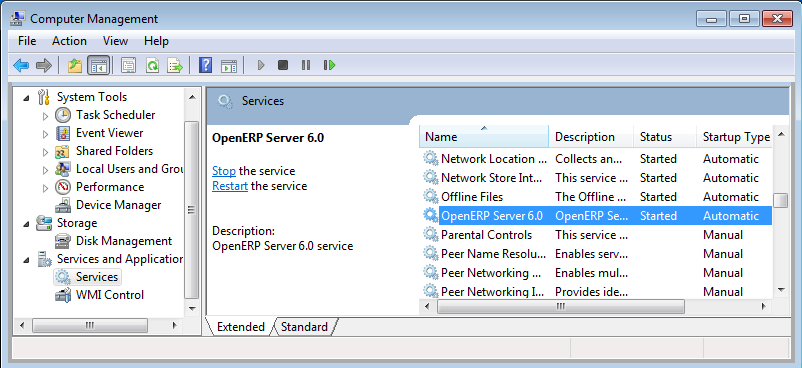
OpenERP 6.1 in the Services list
Here, you can define how the service should act in case of server failure. Access the service’s properties by double-clicking OpenERP 6.1 in the list.
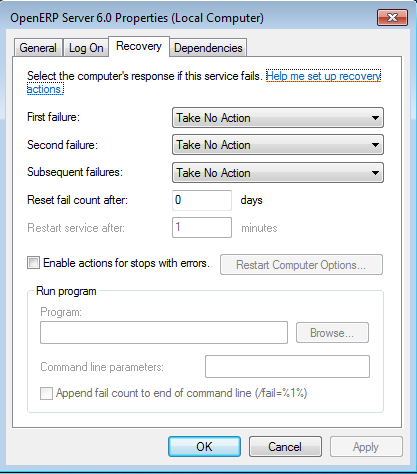
Recovery tab to set service failure response
The Computer Management logging service offers additional information about the execution of the OpenERP Server, for example, the startup or shutdown information of the service.
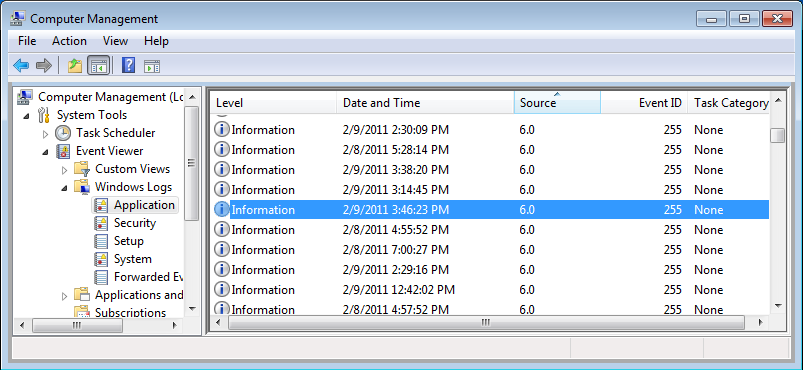
Server information in Windows Logs list
OpenERP Server runtime output can be found in the default logfile. Given that the server is now running as a Windows service, it does not output any runtime messages. For this, the logfile is the only option. Access it from the Start menu, through the View log link in the group of shortcuts for OpenERP 6.1. Alternatively, use the path C:\Program Files\OpenERP 6.1\Server\openerp-server.log.
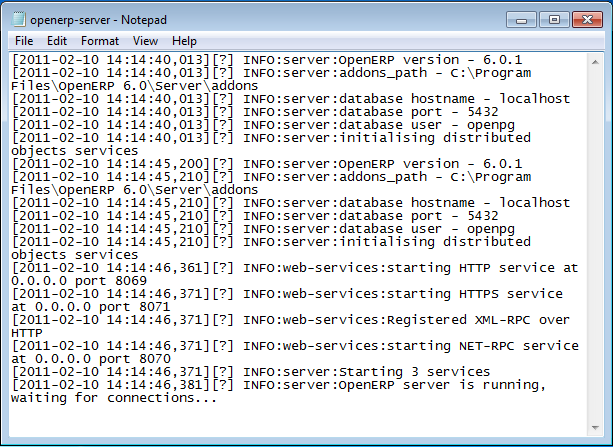
OpenERP Server log file
You can find out whether OpenERP is running by invoking Windows Task Manager. When you look at the Processes tab, you will see OpenERPServerService.exe and openerp-server.exe, both having SYSTEM as their user (to see these, Show processes from all users must be enabled in the Task Manager).
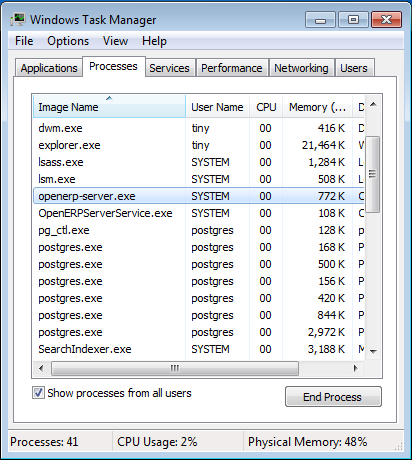
The services in Windows Task Manager
Congratulations, you have successfully installed OpenERP Server
For more information, please take a look at Additional Installation Information and Troubleshooting, where you can find some troubleshooting examples.