Business Example
In this example, you will configure a system that enables you to:
- buy products from a supplier,
- stock the products in a warehouse,
- sell these products to a customer.
The system should support all aspects of invoicing, payments to suppliers and receipts from customers.
Basic Settings
For this business case, you will have to model:
- accounts and account types,
- the suppliers and a supplier category,
- the customers and a customer category,
- some products and a product category,
- an inventory,
- a purchase order,
- a sales order,
- invoices,
- payments.
To test the system, you will need at least one supplier, one customer, one product, a warehouse, a minimal chart of accounts and a bank account.
Get your Database Up and Running without Demo Data
Please note that the new database you have to create, will not include demo data and only the minimally required functionality as a starting point. You will need to know your super administrator password for this – or you will have to ask your ICT manager for the password to be able to create this database.
Please refer to Configuring your OpenERP for more information about how to create a new database that you will give the name of your company.
As a reminder, please find the steps below, without further explanation.
Start by creating a new database from the Welcome page by clicking Databases and then completing the following fields on the Create Database form.
- Super admin password : by default it is admin , if you or your system administrator have not changed it,
- New database name : YourCompany,
- Load Demonstration data checkbox: unchecked,
- Default Language : English (US),
- Administrator password : admin,
- Confirm password : admin.
Press Create to start creating the database.
OpenERP suggests that you configure your database using a series of questions. In the software, these series of questions are managed through so-called Configuration Wizards.
Click the Start Configuration button to continue.
The next configuration wizard will help you to decide what your user interface will look like, whether the screens will only show the most important fields - Simplified - or whether you also want to see the fields for the more advanced users, the Extended view. Select Extended and click Next to continue.
Tip
User Preferences
You can easily switch from Simplified to Extended view by changing your User Preferences.
In the next wizard, you can fill your company data, select your company’s base currency and add your company logo which can be printed on reports. Fill out the required data and click Next to continue.
Select the Warehouse Management, Purchase Management, Sales Management, Manufacturing and Accounting & Finance business applications for installation and click Install. Now OpenERP will start to install these five applications, allowing you to do a complete cycle, from sales / warehouse / purchase / manufacturing to invoice. You will have to wait for the next configuration wizard to be displayed (Loading will appear).
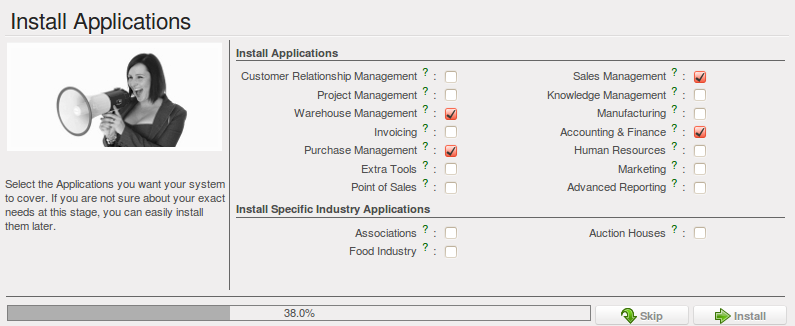
Selecting the Required Functionality
Tip
Reconfigure
Keep in mind that you can change or reconfigure the system any time, for instance through the Reconfigure option in the main bar.
When you choose a business application for installation, OpenERP will automatically propose to add or configure related (smaller) applications to enrich your system. When you install Sales, OpenERP will also ask you whether you want to install Invoicing Journals for instance.
Skip the step that asks you to configure your Accounting Chart, because you will learn how to create accounts.
In the Purchases Application Configuration screen, simply click Configure to continue the database creation.
The following wizards will appear:
- Configure your Sales Management application: click Configure to accept the default settings (no options checked).
- Configure your MRP Application Configuration application: click Configure to accept the default settings.
- Configure your Accounting application: click Configure to accept the default settings.
- Configure Sales Order Logistics: click Next to accept the default settings.
OpenERP’s menu will be displayed, because your system is now ready for actual configuration.
Note
Setup Wizard
You will have to go through the Setup wizard in steps. You have two options:
- If you click the Start Configuration button, OpenERP guides you through a series of steps to: Configure Your Interface - proceed with Simplified (the other option is Extended); and Configure Your Company Information - enter a Company Name and select a Currency for your company. Then OpenERP helps you to install various applications with different functionality through wizards.
- OR -
- When you click the button Skip Configuration Wizards, you can have the screen as shown in screenshot Starting the minimal database. Then you can start working with this minimal database (we will not use this option here).
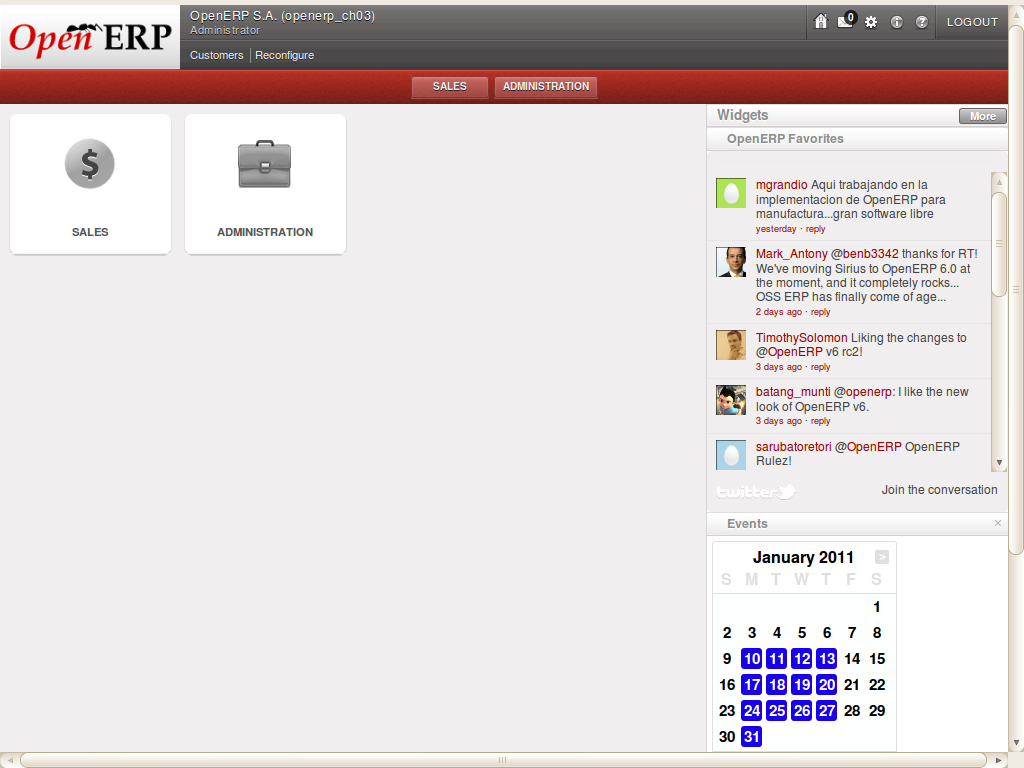
Starting the minimal database